Showing posts with label Mom-To-Be Freezer Meal. Show all posts

Monday, February 23, 2015

Mom on a Budget - TVP Taco Soup

 I love making Taco Soup. It is such a quick and easy meal to prepare and is a winner amongst most people (some members of my family excluded... but only because of the onion)

I first tried making Taco Soup when I was eating a vegan style plant based diet, (I have since discontinued my vegan diet because I found it very restrictive and living in a completely omnivorous home, I found all the extra food prep and cooking too much for me while being pregnant, although I rarely eat eggs, meat and opt for milk alternatives as I am lactose-intolerant.) and I am still asked by some, "How do you make Taco Soup without the beef?" The answer? TVP.

Textured Vegetable Protein is a highly nutritious soy product. It is incredibly wealthy in complete protein and contains no fat, so it is an excellent alternative to meat. Although TVP doesn't add much flavor, it's low in fat and calories, contains a wealth of complete soy protein and it's a good source of dietary fiber. You can use TVP as an extender in meat or protein patties and meatloaf, stews and soups. It works great as a protein additive for health bars, salads, cereals, baked potatoes and stuffing. It is very easy to prepare and takes on the flavor of whatever recipe to which it is added, making it an incredibly versatile addition to a wide variety of dishes.

Anyhoo, enough babbling about TVP - on with the soup!

I've chosen this recipe because it is insanely easy to prepare, cooks quickly, is healthy, nutrient dense and is one of the best friends a budget saavy mom (or anyone) can have. It also makes a decent sized batch of soup and it freezes well.


 For this recipe, you will need:

  • Roughly 1 Tbsp Olive Oil (or oil of your preference)
  • 1 decent sized onion, chopped
  • 1 796ml can of diced tomatoes
  • 1 540ml can of black beans
  • 1 540ml can of six bean mix
  • 2 cups unprepared (dry) TVP
  • 2 cups vegetable stock (or water or stock of your choosing)
  • 1 341ml can kernal corn
  •  1 package taco seasoning (or 2-4 Tbsp of your own taco spice mix)
  • Optional - 1 540ml can of red (kidney) beans

As much as we ALL love music, sometimes the music our own bodies (or maybe, that of your spouses) isn't quite appealing. If you want to avoid the "Musical Fruit" effect, rinse those beans, and rinse them really well. It will wash away all the "food" that the bacteria in your gut thrive on.


'scuse the belly!
Heat the olive oil in a large pot, chop up that onion and toss it in until it's nice and golden brown.


While you're waiting for the onion to brown, prepare your TVP. Follow the directions on the package, but I've found that it is pretty standard to soak the TVP in equal parts liquid. For this recipe, I used 2 cups dry TVP and two cups water (I didn't have any vegetable stock on hand) I often add more liquid, because otherwise I end up with a VERY hearty stew, and while I prefer more of a stew texture than I do soup, it turns out a bit too dry for me.


Once the onion is done to your liking, add your cans of diced tomatoes, rinsed beans, kernel corn, prepared TVP and Taco seasoning and mix that big bad pot up! I prefer to use a blend of spices to make a taco seasoning rather than buy the store bought pouches that are full of preservatives and "ingredients" that I can't pronounce.


Voila! You have a big pot of soup that will easy feed a family of four (possibly more, Baby Bird and I are the only ones in the house who eat this soup) with more for seconds or leftovers. Like I said, it freezes well too, so you can make a batch, use my muffin tin method (Found in this blog entry: http://one-eighty-loosed-a-kaboose.blogspot.ca/2013/04/mom-to-be-freezer-meal-sweet-potato.html

Serve with a dollop of sour cream and cornbread!

Nomnomnom!


Signing off for now!
I hope you give this recipe a try and enjoy it. Don't forget to scroll down and feed the fish!

<3 Robin

PS, this cost me under $15.00 to make!

Sunday, May 26, 2013

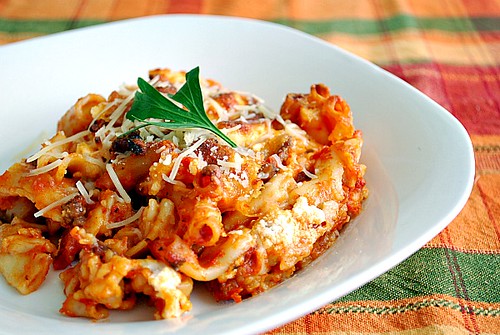
Mom-To-Be Freezer Meal - Baked Penne W/ Sausage & Creamy Ricotta

If you didn't already know, I adore pasta! It's one of my passion foods... and surprise surprise, it's a carb, which I also love. So it was a given that I had to find a freezer meal friendly pasta, and thankfully, there are lots that work for freezer meals.
 
 
When I came across this baked penne with sausage and ricotta I knew right away that I wanted to give it a shot. Sadly, upon my first taste test, I wasn't overly impressed. It tasted SO bland. Even with the spicy sausage and the fennel.

BUT! Upon my second taste test after it'd been in the freezer for a few weeks, it tasted so much better. No doubt the flavours set in while it had been sitting in my freezer. I would make this again, but rather than eating it same day, I'd let it sit in my fridge or freezer to let the flavours mingle. I didn't have penne on hand, so I used rotini which I had plenty of in my pantry.
 
SO! Without further ado, here's the recipe:

Baked Penne with Sausage & Creamy Ricotta
 
Ingredients:
3 tbsp extra-virgin olive oil
2 garlic cloves, minced (I almost always use more garlic. Use to taste)
1 pound hot or sweet Italian fennel sausage, casings removed
1 (28 oz) can tomato puree
1 1/2 cups water
1 1/2 tsp sugar
1 bay leaf
1/4 tsp ground fennel (I didn't use ground - and I think I used around 1 tbsp or more)
salt and freshly ground pepper to taste
1 pound penne (as I said before, I used rotini)
3 cups ricotta
1/2 pound fresh mozzarella, cut into 1/2 inch cubes
1/4 cup freshly grated Parmigiano-Reggiano cheese
 
Directions:
 
Preheat oven to 400 degrees
 
In a large saucepan, heat 1 tbsp of the olive oil. Add the minced garlic and cook over moderate heat, stirring, until lightly browned, about 15-30 seconds. Add the sausage and cook, breaking up the meat, until browned, about 8 minutes. Add the tomato puree, water, sugar, bay leaf and fennel. Season with salt and pepper and bring to a boil. Simmer over low heat until thickened, about 30 minutes. Discard the bay leaf.
 
Meanwhile, cook the pasta in a large pot of boiling salted water until al dente. Drain the pasta and return it to the pot.
 
Reverve 1 1/2 cups of the meat sauce. Transfer the remaining sauce to the pot with the pasta. Toss to combine.
 
Spoon the pasta into a 9x13 inch baking dish. Pour the reserved meat sauce over the pasta and dollop large spoonfuls of the ricotta on top. Gently fold some of the ricotta into the pasta; don't overmix - you should have pockets of ricotta. Scatter the mozzarella on top and sprinkle with the parmigiano-Reggiano.
 
Bake the pasta in the preheated oven for about 45 minutes, or until bubbling and golden on top. Let rest 20 minutes before serving.
 
*Make ahead/Freezer meal:*
Prepare the reccipe above but spoon the pasta into a freezer- and oven-oven safe container. (I line mine with aluminum foil so there is less clean up at the end) Pour the remaining tomato sauce over the pasta and dollop large spoonfuls of the ricotta on top. Gently fold some of the ricotta into the pasta; don't overmix - you should have pockets of ricotta. Scatter the mozzarella on top and sprinkle with Parmigiano-Reggiano. Cover and freeze. When ready to serve, defrost and bake the pasta in 400 degree oven for about 45 minutes, or until bubbling and golden on top. Let rest for 20 minutes before serving.

Saturday, May 11, 2013

Mom-To-Be Freezer Meal - Soups and Stews II

In my last post about soups and stews, which can be found here: http://one-eighty-loosed-a-kaboose.blogspot.ca/2013/05/mom-to-be-freezer-meal-soups-and-stews-i.html instead of me writing it out again or copying and pasting if you'd like to read more on that.

I sang praise to how easy it is to freeze soups and prepare soups from frozen. I wrote how I choose to freeze and package my soups (and stocks) and I really do believe that the muffin tin method is the easiest method, especially if you want to be able to make single serve portions.

The following soups are quite good, although personally, I wouldn't make them often.


Irish Beef Stew
This stew freezes really well.
Ingredients:
1/2 - 1 lb stewing beef
salt and pepper
2 tbsp olive oil
1 11.2oz bottle Guinness Draught (I actually haven't used this any time I've made this stew and it turns out fine, but I imagine it would add a new dimension of flavour.)
1 cup red wine (virgin wine works well if you don't have the alcoholic kind)
5 cups beef stock
1 tsp dried thyme (or a couple sprigs fresh.)
3 bay leaves
2 tbsp ketchup
3 large russet potatoes, peeled
2 large carrots (or 20 baby carrots)
1 yellow onion
2 tbsp butter
Fresh parsley

Directions:
If your beef is in large chunks, chop into small bite sized pieces. Sprinkle with salt and pepper. Heat the oil on med-high heat in a large stock pot and add the meat. Cook the meat for several minutes on each side, using tongs to turn over individual pieces so the meat gets nice and brown.

When your beef is browned, add the Guinness, red wine, beef stock, thyme, bay leaves and ketchup. Stir well. Bring the mixture to a boil, then reduce the heat to low and simmer while covered for 1 hour and 15 minutes.

While beef is simmering, chop your potatoes and carrots into bite sized pieces, and finely chop the onion. (If you have a picky eater in the house and have to pick out the inions afterward... sad, I know, you can quarter the onion instead, so the onion is easier to pick out.) In another pot, melt the butter on medium-high then add the potato, carrot and onion. Stir the vegetables so that they are coated with butter and cook for about 20 minutes, stirring every few minutes so that the vegetables get caramelized. Try and time it so your vegetables finish at about the same time that the simmering beef ends.

Add the vegetables to the beef and broth. Simmer another 20 minutes with the lid on. Ladle the stew into bowls and sprinkle with freshly chopped parsley.


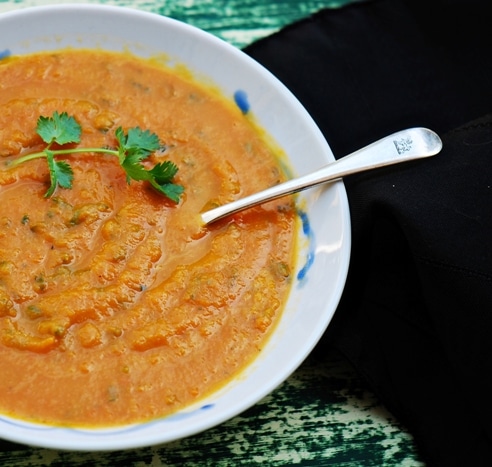
Roasted Carrot & Cilantro Soup
This soup freezes really well in small batches and can last up to three months in a deep freeze.
Ingredients:
2 lbs carrots, peeled and uniformly sliced
2 tsp vegetable oil
salt and pepper to taste
1/2 tsp cumin (I think I used about 1 - 1 1/2 tsp cumin, I might use 2 tsp next time)
1 large onion, roughly chopped
2 tbsp vegetable oil
6 small new or nugget potatoes, about 2/3 lb (I think I used about 2 cups russet potatoes)
8 cups chicken stock
1 cup cilantro (lightly packed, stemps cut off)

Directions:
Preheat oven to 400 degrees. Toss sliced carrots in 2 tsp vegetable oil, salt, pepper and cumin. Roast in centre of oven for 30 minutes, turning once in between. Removed when slightly caramelized or blackened. Set aside.

In a heavy bottomed saucepan, saute onion on medium heat in 2 tbsp oil. Meanwhile, peel potatoes and cut into large chunks. Once onions have turned slightly translucent, add potatoes and saute for about 10 minutes.

Add the stock and turn the heat up to high. Once boiling, lower to a simmer. Keep simmering until the potatoes are almost done, about 10-15 minutes, then add the roasted carrots. Cook just enough to bring the carrots up to temperature, then remove from heat.

Pour soup into blender or food processor in batches (or use an immersion blender). Add in your cilantro at this point. Blend until it becomes as smooth as you like.  Return to saucepan and reheat.

Saturday, May 4, 2013

Mom-To-Be Freezer Meal - Soups and Stews I

The fantastic thing about soups, is that they freeze quite well, with a few exceptions to the rule of course. Another wonderful thing about freezer meal soups? They are SUPER easy to prepare. Usually, I take the soup I want out about 30 minutes to an hour before I want to eat, place it in an appropriate sized pot and let thaw out a little before I turn on the element. If I have the stove on already for something else I'm preparing, it's doubly easy. I put the pot with the frozen soup over the element that vents the heat from the oven (on my stove, it's the top right element that has the oven heat vent) to help the soup to thaw out at a faster rate before I turn on the element to actually reheat the soup. If I'm in a rush, I skip thawing and jump straight to reheating the soup to hot - starting at a low heat and gradually turning up the heat as the soup is thawed and becoming hot.


My freezing method for stocks and soups is the "muffin tin method". I spoon whatever soup/stock into my muffin tins. I know that my muffin tins can hold up to 1/4 cup of whatever I want to freeze, which makes thawing easier than if I freeze in a jar or other larger container. It also allows me to take out single serve portions.

Once whatever I'm freezing is frozen and ready to be packaged, I take out my tins and place them on the counter for a few minutes for things to loosen (If I'm in a rush, I'll put some warm water in the bottom of my kitchen sink to encourage quicker loosening - although, I'd make sure to have the extra few minutes for blended/smooth soups, since they loosen pretty quickly and if you place the tin in warm water, even for a few seconds too long, things can get messy and your soup moulds could end up frozen together once they're packaged and refrozen)

Once things are loose and I can turn the mould around while it's inside the tin, I know it's ready to come out. You can take the moulds out a few ways, I usually opt for grabbing a butter knife and popping each one out - but be careful, if you have really nice tins, you can scratch the sides and/or bottoms and they can rust if you let them air dry. Or, you can flip the whole tin over and let them fall out onto your counter or a big cookie sheet.

Then I toss my prepared frozen moulds into a freezer bag, labelled with the contents, cooking directions, the date it was packaged. If I'm giving packaged freezer meals to a friend, I will include a list of ingredients in case they have an allergy I forgot about and I might include the website or the written out recipe in case they like it and want to make it themselves.


Butternut Beet Soup

I liked the idea of this soup. I really like beets quite a bit and I've wanted to start cooking with squash more often.Once I had all the ingredients though, I started to wonder how well all of the flavours would interact with each other. I have to say, I was not disappointed. I think this might be my all time favourite soup - for now that is.

Ingredients:
3 medium beets
4 medium carrots
1 medium butternut squash
5 cups chicken or vegetable broth
1 14oz can unsweetened coconut milk
2 onions, chopped
10 cloves garlic, peeled
4 oz fresh ginger (I used a little less, about 3 oz maybe)
2 bay leaves

2 limes
2 cups fresh cilantro (loose with stems cut off)
1 tsp sriracha - thai chili vinegar hot sauce (I used Franks Red Hot Sauce as I didn't have this and didn't have the money in our food budget to buy any)
1/2 cup plain Greek yogurt

Directions:Clean and peel carrots, beet and squash. Chop into sections less than 4 inches long. They just need to fit into the pot, don't worry about how big they are, you will puree them once they are cooked.

In a large pot (I ended up having to use two pots, I once everything was pureed, I just mixed all the pureed soup together so there would be no chance of inconsistant taste) over medium heat add the carrots, squash, beets, broth, coconut milk and bay leaves. Cover and allow to come to a boil.

Meanwhile, saute the onion in a tablespoon of olive oil over medium heat. Mince the garlic and ginger. Once onion is translucent add garlic and ginger. Saute for an additional minute then add the onion mixture to the pot of stewing vegetables. When the soup pot starts to boil, reduce heat and simmer. Simmer covered for 30 minutes or until the vegetables are tender, stirring occasionally.

While soup is simmering, make the lime cilantro yogurt sauce. In your food processor add the juice of two limes, yogurt, cilantro and hot sauce. Puree until smooth. Pour into a small serving bowl and refrigerate until you are ready to serve the soup.

When the veggies are soft, you are ready to remove the bay leaves and puree the soup. Then use an immersion blender to puree the mixture. If you don't have an immersion blender, puree the soup  in batches through a blender or food processor.

To serve soup fresh, pour into bowls and top with a dollop of yogurt sauce. You can make a design if you like using simple tools like a spoon and chopsticks. If you are freezing the soup, add all the yogurt sauce and blend.

Do you have a favourite freezer meal soup?

Wednesday, May 1, 2013

Mom-To-Be Freezer Meal - Banana Nut Bread Muffins (Nuts Optional)

Is it a surprise that I'm going to be talking about a recipe from one of my favourite recipes books? The Williams-Sonoma Essentials of Baking has a great banana bread recipe, and it's quickly become a Go-To for me. It doesn't give instructions or timing adjustments in the book if you want to make muffins instead of a full loaf, so I took the liberty of testing it out. If you choose to make muffins with this recipe, it takes 25-30 minutes until they are done, depending on the climate and region you live in, of course.

 
Now, the reason I have the '(Nuts Optional)' in the posts title, is because I don't often care for nuts in my banana bread - I usually replace the nuts with chocolate chips.
 
Delving a little deeper into why I absolutely <3 LOVE <3 this recipe, is because it's SO versatile! I've subsituted the nuts with so many different ingredients it's ridiculous - and I've loved all of the variations I've tried to date. Below, is a list of substitutions that I've tried and loved.
  • Fresh peaches (I've also tried this with fresh that I've flash frozen myself)
  • Fresh Nectarines (I've also tried this with fresh that I've flash frozen myself)
  • Chocolate chips, obviously
  • Fresh cranberries (I've also tried this with fresh that I've flash frozen myself)
  • Apple
In the future, I would love to try blueberries (thankfully, we have a blueberry farm in the local area, which I plan to visit in the summer) dried cherries and I think it would be interesting to try this recipe with pumpkin. I'm not usually a fan of pumpkin, but I'd like to start experimenting.

To freeze these muffins, I wait until they are completely cooled and then simply toss them into a freezer bag.

So, without further ado, here's the recipe for the:
Williams-Sonoma Banana Nut Bread
Ingredients:
2 large bananas
1 1/2 cups all purpose flour
1/2 cup whole wheat flour (I don't often have whole wheat flour, so I just add more all purpose flour)
2 tsp baking powder
1/2 tsp baking soda
1/4 tsp salt (For those of you who know me, know that I skip adding salt to most recipes)
1/4 tsp grated nutmeg (I add more but I don't measure it out, I also add cinnamon and ground ginger. For these spices, I go by the fragrance they make together rather than measuring)
1 tbsp grated orange zest
1/2 cup chopped walnuts (or whatever you'd like to substitute)
2 large eggs
3/4 cup firmly packed brown sugar
6 tbsp unsalted melted butter
1/2 cup whole milk

Directions:
Position a rack in the middle of the oven, and preheat to 350 degrees, butter and flour a 9x5 inch loaf pan - if making muffins, generously butter the muffin tin. I prefer not to flour the muffin tin.

In a small bowl, mash the bananas. You should have 1 1/3 cups. In a seperate bowl, stir together the all purpose flour, whole wheat flour, baking powder, baking soda, salt (if using) nutmeg (cinnamon and ginger if using), orange zest, and nuts - or chocolate chips. If you are going to use a dried fruit, add it now as well. If you are using fresh fruit, either add it in with the mashed banana or after the batter is formed.

In a large bowl, whisk the eggs until blended and stir in the brown sugar, butter and milk. Add the dry ingredients in 3 batches, alternately with the bananas and stir with a rubber spatula unitl just the batter is moistened.

Pour the batter into the prepared tin and smooth the top with the rubber spatula. Bake until a toothpick inserted into the centre comes out clean, 50-60 minutes for a loaf, 25-30 minutes for muffins. If the surface starts to brown too much (I haven't had this problem with the muffins), cover with a sheet of aluminum foil for the last 15 minutes.

Transfer to a wire rack and let cool in the pan for 5 minutes, then turn out onto the rack and cool completely. For the muffins, they should come out rather easily, but if they don't you may want to leave them in the tin for just a little longer, but don't be afraid to sacrifice one muffin to see if they are ready to come out.

Store in an airtight container at room temperature for 2-3 days or freeze up to one month.

Mom-To-Be Freezer Meal - Pancakes

When I was in the early stages of making my Mom-To-Be Freezer Meal Plan, I have to admit, I completely forgot about breakfasts. It was all thanks (again) to Pinterest for reminding me that first thing in the morning with a new baby, the only thing I might actually want to make from scratch - is coffee.
 
As I've noted before, in my family, we never did freezer meals, so like with all the other recipes I chose, I didn't know what would work well for breakfasts. All I knew was that I didn't like the idea of frozen breakfast borritos. Reason one: I've turned off eggs for the most part since being pregnant. Reason two: I'm not a fan of omlettes - and to me, a breakfast borrito is just an omlette that's rolled up.
 
Thankfully! I LOVE pancakes! I wanted to make waffles as well, but unfortunately, I haven't gotten around to buying a waffle maker yet - and for something as awesome as waffles, I want to get a decent model. So, so far, for freezer meal breakfasts, I've just got pancakes. The freezing method I used for these, once they were cooled, was to wrap each individual pancake in aluminum foil and then toss them into a freezer bag. I've noticed that many people like to put their freezer pancakes in an old bread bag, but without thinking, I recycled mine prior to making the pancakes. To prepare, I take as many I want out of the packaging, put them in the microwave on a plate in a single layer, turning occassionally until they are fully thawed, hot and ready for toppings.
 
I have two recipes that I've made so far, one Martha Stewart recipes that I've liked for ages that you can make with an orange maple butter (the orange maple butter is pretty good from what I remember, but it wasn't earth shattering enough that I have to make it everytime I make pancakes).
The second recipe, which I just found recently, is made with ricotta cheese. I actually looked for a recipe that contains ricotta cheese because for my baked penne with sausage and creamy ricotta (entry to be added) - I actually forgot to add the ricotta to a few of the single serve meals, so I had extra. I still haven't tried this recipe fresh or frozen yet, since ricotta isn't a pasturized cheese and I'm restricted from it for now. I'm also not sure how these pancakes will freeze, but, I decided that I was willing to test it out.
 
ALL that being said, here are my pancake recipes for you.
 
 Martha Stewarts Blueberry Cornmeal Pancakes
Ingredients:
1 cup all-purpose flour
1/2 cup cornmeal
1/4 cup sugar
1 1/4 tsp baking powder
1 tsp coarse salt (I usually leave out salt recommended in recipes)
1/2 tsp baking soda
1 1/2 cups low fat buttermilk
1/4 cup whole milk
3 tbsp unsalted butter, melted and cooled, plus more for griddle
1 large egg, lightly beaten
2 cups blueberries
 
*Note: If I don't have buttermilk, I have used just the cream in the amount needed for both the buttermilk as well as the cream (or vise versa if I don't have the cream)

Directions:
Whisk together flour, cornmeal, 2 tablespoons sugar, the baking powder, salt (if using) and baking soda. In another bowl, whisk together buttermilk, milk, butter and egg. Whisk wet ingredients into dry ingredients until just combined (mixture will be lumpy).
 
Heat a griddle or a large nonstick skillet over med heat. Toss blueberries with 2 tbsp sugar. Brush griddle with melted butter and spoon batter into griddle 1/3 cup at a time. Sprinkle with sugared blueberries, about 2 tbsp per pancake. Cook until edges are set, 3-4 minutes. Flip and cook until golden brown, about 2 minutes. Repeat with remaining batter and blueberries, adding more butter to griddle and keeping prepared pancakes warm on a baking shee in the oven. Serve with orange maple butter and maple syrup. http://www.marthastewart.com/350631/orange-maple-butter


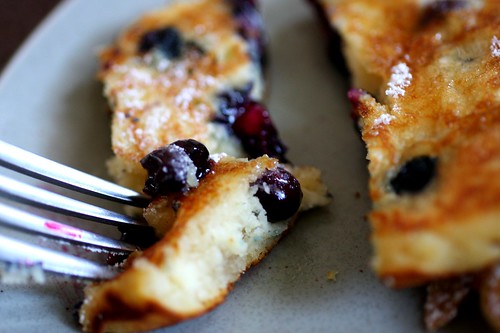
Blueberry Lemon Ricotta Pancakes 
 
Ingredients:
15 ounces low fat ricotta cheese
1/3 cup granulated sugar
2 large eggs
zest of 1 lemon
1 teaspoon vanilla extract
2/3 cup whole wheat pastry flour (or all-purpose flour)
1 cup blueberries
cooking spray
confectioners' sugar or maple syrup, for serving (optional)
 
Directions:
In a medium bowl. whisk together ricotta cheese, sugar, eggs, grated lemon zest and vanilla extract. Fold in flour until just combined; add blueberries, gently mixing until combined. Spray large non-stick skillet with cooking spray and heat to medium-low heat. Add batter, using a scant 1/4 cup for each pancake. Cook until browned, 4 to 5 minutes per side. Transfer pancakes to a paper towel-lined plate.

Serve hot, with confectioners' sugar or maple syrup, if desired.

Tuesday, April 23, 2013

Mom-To-Be Freezer Meal - Cornbread & Buttermilk Clover Rolls

Ahhhh, breads! How I love bread! For both of these recipes, once they are finished and cooled, I just toss them into a large freezer bag and take out just as many as I need at the time. I usually take them out about an hour before I want to eat, let them thaw for a while, and toss them in the microwave so they are warm when I eat them. I do flip them over so they are heated evenly.

I am a HUGE fan of cornbread. My favourite meal when I went to summer camp was when chili night finally came - and it always came - because it was always served with cornbread. LOTS of cornbread.
The recipe I use is from one of my favourite cookbooks, which I received as a gift from someone who loves me very much. <3
I have to say, some of my favourite recipes are from this book.

The Williams-Sonoma Essentials of Baking Classic Corn Bread recipe has the option to add fresh corn kernels, as well gives you a few flavour variations. Although I haven't tried the variations yet, I have to say, Red Pepper and Jack Cheese Cornbread sounds yummy - I'm not too sure about the Sun-Dried Tomato and Pistachio Cornbread.

I did manage to find the exact same recipe on someone else's blog, because well, I didn't want to have to type the whole recipe and directions out - but I really dislike when I am checking out recipes on blogs and get redirected to another blog - I guess I'm going to have to suck it up and write my blog to my standards and my (blog follower/reading) preferences. You lucky bugger you...
Williams-Sonoma Classic Corn Bread

Ingredients:


1 cup cornmeal

1 cup all purpose flour1 ½ teaspoons baking powder
½ teaspoon baking soda
½ teaspoon salt
2 cups fresh corn kernels (Optional, and I left them out)
2 large eggs
3 tablespoons honey or firmly packed brown sugar (I used brown sugar)
1 1/3 cups buttermilk (If you don’t have buttermilk on hand you can add 1 tablespoon lemon juice and then enough milk to equal 1 cup, then let sit for 5 minutes)
3 tablespoons unsalted butter


Directions:
Position rack in the middle of the oven and preheat to 425 degrees. Butter an 8 inch cast iron frying pan or an 8 inch square baking pan. (For the last batch I made, I double the recipe, so I had to use a bigger baking pan)

In a bowl, whisk together the cornmeal, flour, baking powder, baking soday, salt and the corn kernels (if using). Set aside.

In a large bowl, which the eggs until blended. Add the honey (or brown sugar), buttermilk and butter. Whisk until blended. Add the dry ingredients and stir until evenly moistened.

Pour the batter into the prepared pan and smooth top with spatula. Bake until a toothpick inserted in the centre comes out clean, 20-25 minutes. Let the bread cool slightly in the pan on a wire rack. Serve warm. Store at room temperature in an airtight container for 2-3 days or freeze up to 1 month.


Buttermilk Rolls
I found the buttermilk rolls online, and I have to say, I love, love, LOVE this recipe! The rolls are tasty, have few ingredients that you probably already have in your house and are quick and easy to make. With this recipe, you don't have to let the dough rise for very long - and you don't have to punch down and let rise for a second time.

If you had to have fresh rolls and have them done for company coming over in a couple hours, this would be the recipe you are looking for.

Ingredients:
3 1/4 cups flour
1 teaspoon salt
1 (0.25 ounce) package active dry yeast (2 1/4 tsp)
1 cup low-fat buttermilk
1 tablespoon honey
5 tablespoons butter, melted and divided
1 egg

Method:
In a large bowl, whisk together 1 1/2 cups of the flour, salt and yeast until well combined; set aside. In a small pot, heat buttermilk until warm to the touch (about 115°F). (Be careful not to overheat the milk since it may cook the egg.) Remove pot from heat and whisk in honey, 3 tablespoons of the butter and egg. Pour buttermilk mixture into bowl with flour mixture and whisk until a thick batter is formed. Stir in remaining 1 3/4 cups flour until a soft dough is formed.
Turn dough out onto a lightly floured surface and knead, dusting dough with more flour as needed to keep it from sticking, until smooth and no longer sticky, 7 to 8 minutes.
For cloverleaf rolls, divide dough into 36 equal pieces and roll each piece into a ball. Arrange 3 balls of dough in each cup of a greased 12-muffin tin. For large pull apart rolls, divide dough into 12 equal pieces and roll each into a small ball. Arrange balls of dough snugly in a greased 9-inch round cake pan. Brush rolls with a bit of the remaining 2 tablespoons butter, then cover loosely and set aside in a warm spot until doubled in size, about 1 hour.
Preheat oven to 375°F. Brush rolls with remaining butter and bake until deep golden brown and cooked through, 20 to 25 minutes. Serve hot, spread with butter, if you like.

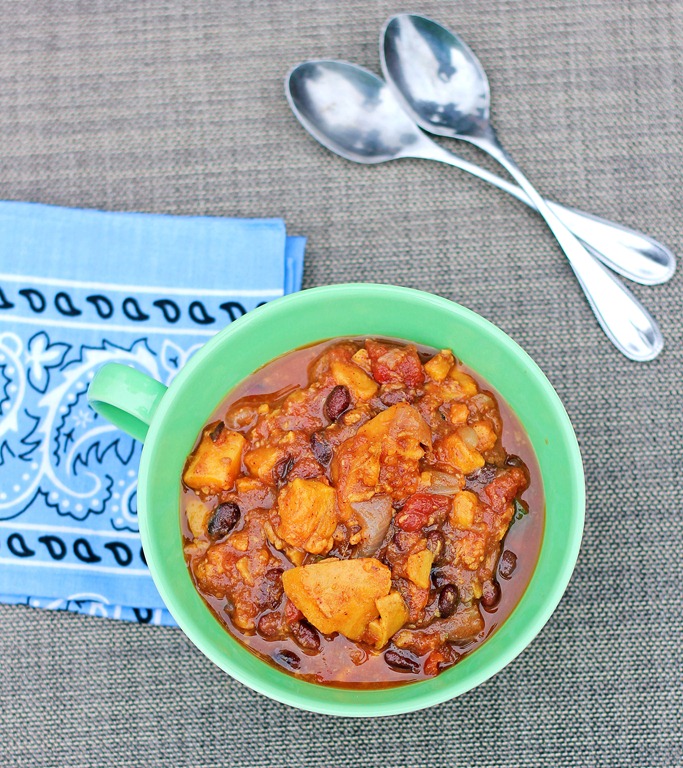
Mom-To-Be Freezer Meal - Sweet Potato Chili

I have to tell you honestly, I'm doing my first taste test as we speak you read. My very first response to this recipe,  http://chocolatecoveredkatie.com/2012/01/05/sweet-potato-chili/ was a little less than enthusiastic. The recipe is super simple and really easy to follow - toss the prepped ingredients in a pot, boil, turn down and simmer.

I love finding recipes that have a little something different to offer and that aren't the exact same as every other recipe out there, which is why I found "sweet potato chili" intriguing. I love sweet potatoes, I'm a fan of flavour and spices, it's a healthy recipe - and what goes better with chili than a side of corn bread?

First response after the first taste? "Meh." I really thought that my favourite part of tonights meal would be the corn bread. The chili was still quite hot, which I think was part of my issue. My theory is, that with it being so hot, it tasted more bland than it actually is, because once it started to cool a little, I ended up liking the chili more and more - even though the corn bread was probably still my favourite part... but I love my carbs, and well, corn bread is pretty much awesome.

After being frozen, the sweet potato and the zucchini were pretty mushy, so I'd suggest that if you plan on serving it to guests, serve fresh the day of or the day after. (Katie said in her blog entry that she thought the flavour of the chili was better the day after.)


My freezer meal method for this recipe is the same method I use for my stocks and soups. the muffin tin method!

For my muffin tins, I know I can fit 1/4 cup of whatever I'm baking/freezing, which makes for easy single serve meals and easy measuring when I'm making a soup and need to measure out the amount of stock I'll need. It also makes it easy to take out the exact amount I need, instead of a bigger batch than I actually need.

Once whatever I'm freezing is frozen and ready to be packaged, I take out my tins and place them on the counter for a few minutes for things to loosen (If I'm in a rush, I'll put some warm water in the bottom of my kitchen sink to encourage quicker loosening - although, I'd make sure to have the extra few minutes for blended/smooth soups, since they loosen pretty quickly and if you place the tin in warm water, even for a few seconds too long, things can get messy and your soup moulds could end up frozen together once they're packaged and refrozen)

Once things are loose and I can turn the mould around while it's inside the tin, I know it's ready to come out. You can take the moulds out a few ways, I usually opt for grabbing a butter knife and popping each one out - but be careful, if you have really nice tins, you can scratch the sides and/or bottoms and they can rust if you let them air dry. Or, you can flip the whole tin over and let them fall out onto your counter or a big cookie sheet.

Then I toss my prepared frozen moulds into a freezer bag, labelled with the contents, cooking directions, the date it was packaged. If I'm giving packaged freezer meals to a friend, I will include a list of ingredients in case they have an allergy I forgot about and I might include the website or the written out recipe in case they like it and want to make it themselves.


All in all, I think I would make this recipe again, and wait for it to cool off a little bit before I started eating again so I can enjoy all the flavours right from the beginning.

In my next entry I'll be sure to include the recipe for the corn bread I enjoyed so much with dinner tonight. It comes from one of my favourite recipe books.

Do you have a favourite or go-to chili recipe?
Have an awesome day and thanks for reading!

Oh! And don't forget to scroll down past the comments section and feed the goldfish - I think it's been a while since they've been fed :)

Monday, April 15, 2013

Making My "Mom-To-Be" Freezer Meals - Intro

In the earlier stages of my pregnancy, I decided that I definitely wanted to make freezer meals so in my future sleep deprived state, I wouldn't have to be stuck with trying to figure out what to eat last minute - as well as not having to eat fast food for nearly every meal.

BUT!

I had NO IDEA where to start. Making freezer meals wasn't practiced in my house growing up and up until recently, I didn't see much value in preparing freezer meals. Needless to say, I had a lot of online reading to do. I didn't know what would freeze well, how to package and store them - as well as for how long.

I have to say, thank GOD for Pinterest! I found the majority of my information, ideas and recipes on Pinterest. Seriously, if you haven't checked it out yet, you really should. I think the next few blog entries will be dedicated to the recipes, websites and techniques I've learned to better prepare myself for motherhood.

One obstacle that I needed to overcome was that I needed more than just the fridge/freezer combo. I wanted an extra freezer for the basement so I could have the room for the amount of extra food that I planned on making to make meal planning easier in the earlier days. Chest freezer. Standing freezer. Didn't matter to me. I wanted extra room.

I'm also pretty frugal, so I didn't want to have to pay an arm and a leg for a freezer. Solution? I checked the store fliers for sales. I also checked Kijiji - often. I eventually found a small chest freezer on Kijiji that was being sold for $50.00. I was a little skeptical since they were selling it for so little a price, but they'd had it for a few years already and had recently upgraded to a larger, standing freezer. And they'd told me that if I had any problems with it, I could bring it back to them and they'd give me my fifty smackers back. I decided to gamble and buy the freezer from Kijiji.

And! I love it! It was the best $50.00 that I've spent.

AAAALLLLLLLL that being said, stay tuned for my tales of making freezer meals, swollen ankles and check out the recipes. And consider making your own freezer meals, whether you are about to be a new parent, just have a busy schedule, for unexpected guests or to learn something new.

Do you already do freezer meals? What is your favourite freezer meal recipe?